

Build a candidate bank with tags
A “candidate bank” is a segment of your talent pool you want to pull up in one click — senior developers open to remote work, the graduates from your 2026 campus campaign, candidates shortlisted for a client. In Nextal, a bank is built in four moves: tag the candidates, filter the list by tags, save the filter, then mark it as favorite.
Step 1 — Pick a tag naming convention
Tags are created on the fly: the first time someone types campus-2026, the tag exists for the whole organization. There is no admin screen to rename or delete them — a typo stays in the list. Hence the value of agreeing on a convention before you start:
- Short and predictable —
senior-dev,campus-2026,accountant-bank. - One prefix per purpose — e.g.
bank-…for your banks,campaign-…for campaigns. The tag list then reads itself. - Avoid variants —
remote,Remoteandteleworkcreate three different tags. Agree on a single form as a team.
Step 2 — Tag the candidates
In bulk, from the candidate list
The fastest way to build a bank out of existing candidates.
-
Show the right candidates
Use search and filters to narrow the list down to the people you want to tag.
-
Tick the candidates
Tick the checkboxes at the start of the rows (the header checkbox ticks the whole page; the selection persists across pages). The toolbar is replaced by the bulk-action bar.
-
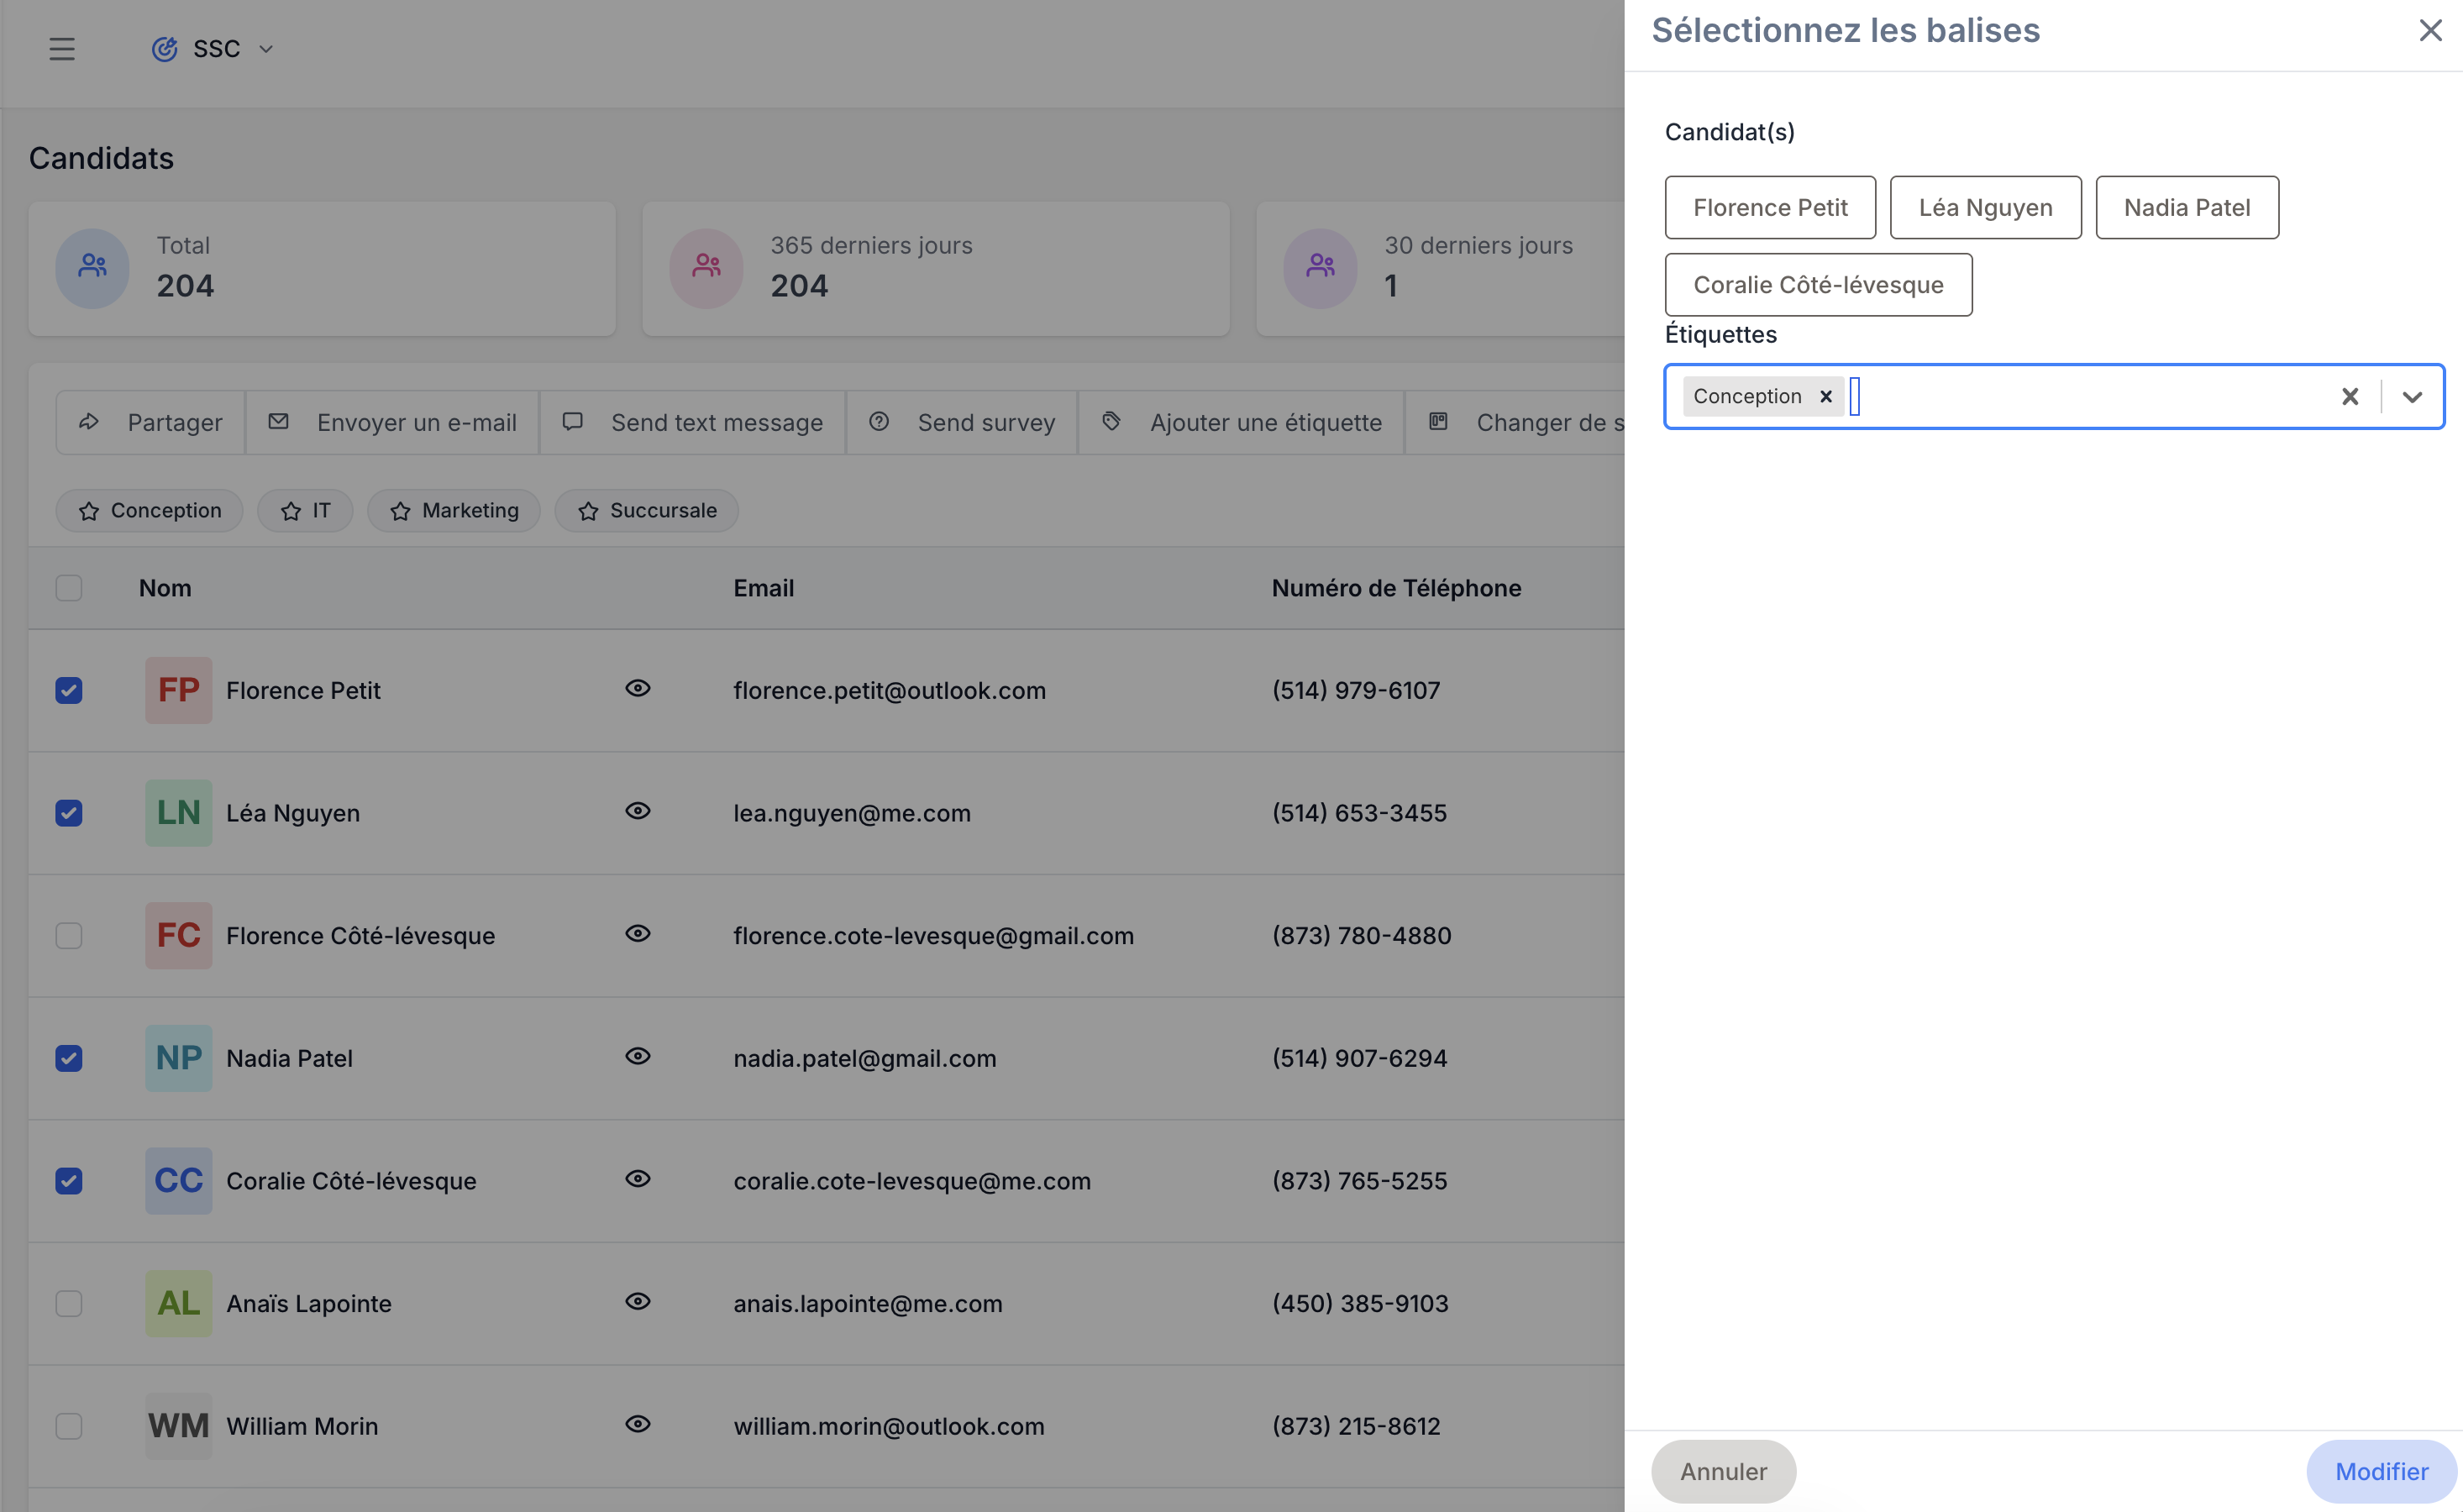
Click Add tag
A side panel titled Select tags opens on the right, listing the selected candidates.
-
Pick or create the tags
The Tags field offers the existing tags; type a new name to create it on the spot.
-
Click Update
The chosen tags are added to every ticked candidate — the ones they already carried are kept, and no duplicate is created if a candidate already had the tag. The panel closes right away, without a confirmation message.
One by one, from the candidate profile
This is also the only place to remove a tag — the bulk action only adds.
-
Open the profile, Profile tab
Then the Overview sheet.
-
Click Edit
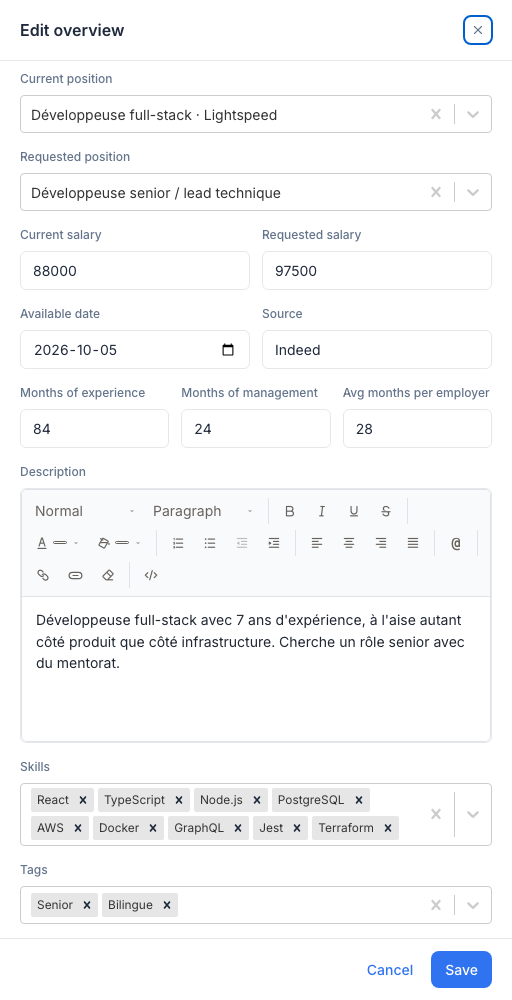
The Edit overview side panel opens on the right.
-
Fill in the Tags field
The field reads Add a tag…: pick from the list, or type a new name and click Create ”…”. To remove a tag, click its ×.
-
Click Save
See Candidate profile for the rest of the panel.
During a bulk import
If your bank comes from a file (job fair, purchased list, campaign), tag the whole batch during the bulk import: on the Configure step, the Add tags to all imported candidates field applies the chosen tags to every created profile. A “Tags” column in the file can also be mapped for per-row tags.
From a job’s Kanban board
On the applicant board, select applications then use the Add tag button (tag icon). The tags are written to the candidate profile — handy for moving a job’s good-but-not-hired candidates into a bank.
Step 3 — Filter the list by tags
-
Open the All filters panel
The funnel button on the right of the list toolbar.
-
Click And, then pick Tags
Type “tag” in the panel’s Search field to find it fast.
-
Pick the operator
- has one of — the candidate carries at least one of the chosen tags (the usual case for a bank).
- has all — they carry every chosen tag (to intersect two banks, e.g.
senior-devandmontreal). - has none of — they carry none of them (to exclude a bank).
-
Select the tags, then Apply
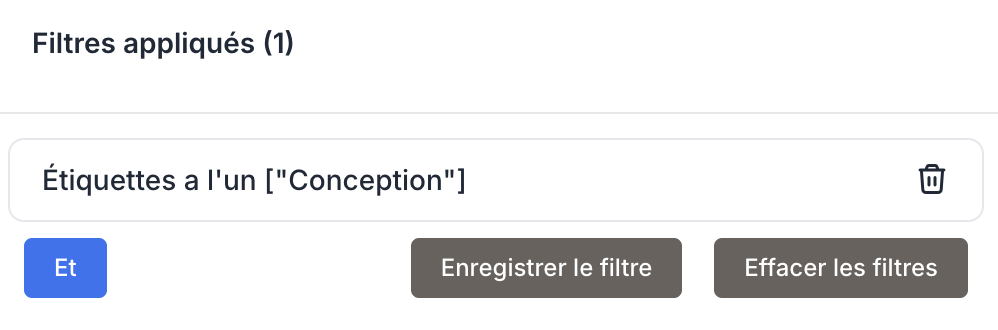
The filter shows up under Applied filters and the list narrows. Add more filters as needed (Status, City, Work mode…) — they stack, and every candidate must satisfy all of them.
Step 4 — Save the filter and mark it as favorite
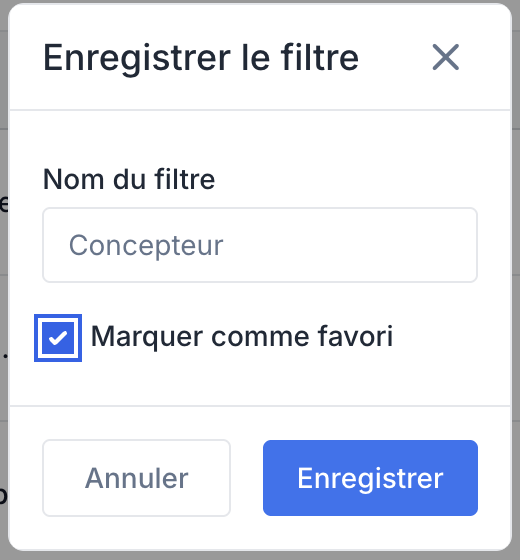
-
Click Save filter
In the Applied filters section of the panel — the button only appears once at least one filter is applied.
-
Name the bank
The Filter name is required: 1 to 50 characters, unique among your saved filters (otherwise: A filter with this name already exists). Name it after the bank — “Senior developers bank”.
-
Tick Mark as favorite
This is what pins the bank above the list. You can also do it later with the star next to the filter in the Saved filters section.
-
Click Save
A Filter saved notification confirms. The save captures the current filters and search text and sort — the whole view.
Where to find your saved filters and favorites
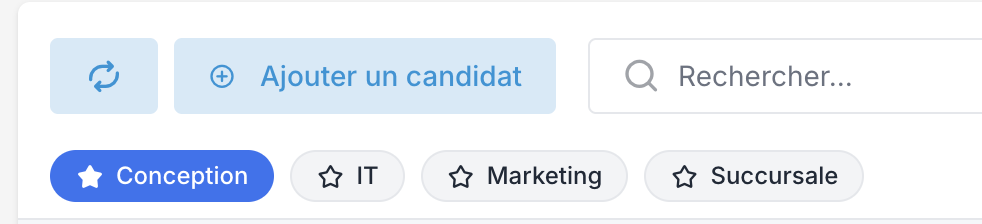
Your banks live in two places: all of them in the filters panel, and the favorites as chips above the list.
In the panel — the Saved filters section
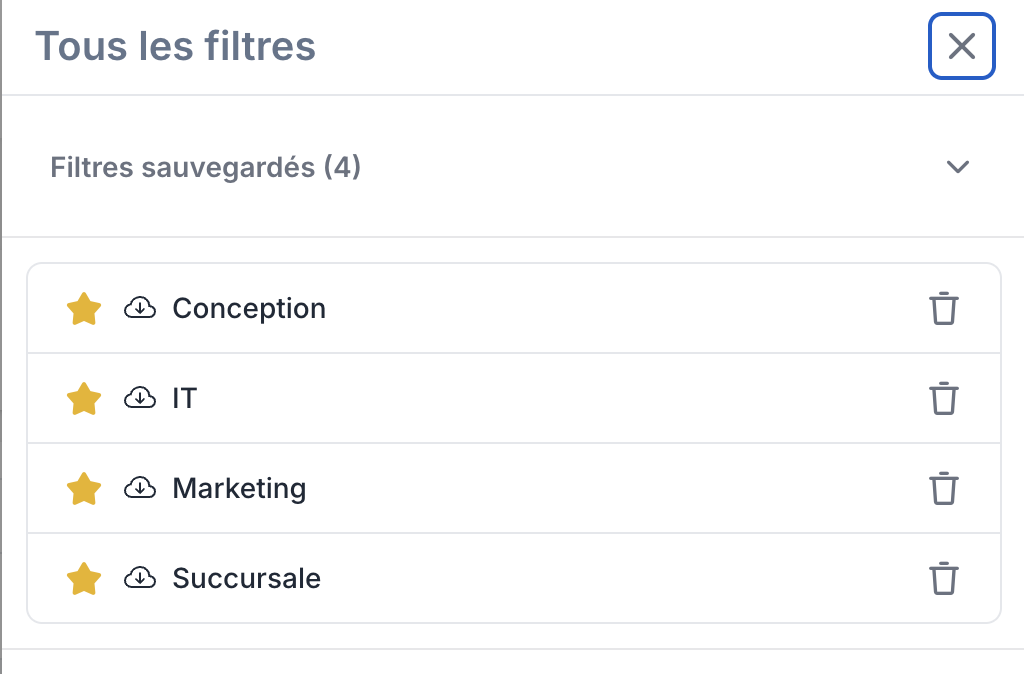
Open the All filters panel (funnel button): the Saved filters section lists every filter you saved, favorites first then alphabetically (until you have one, it reads No saved filters yet). Three actions per filter:
- Click its name — applies the filter (filters + search + sort, exactly as saved).
- The star — toggles the favorite (Mark as favorite / Remove from favorites). Favorites earn their chip above the list.
- The trash icon — deletes the filter, after a confirmation (Delete filter — the operation can’t be undone).
Above the list — the favorites bar

Filters marked as favorite show up as starred chips between the toolbar and the table — the bar is only visible once you have at least one favorite. One click on a chip applies the bank; the active chip is highlighted; a second click deactivates it. Favorites don’t apply themselves when the page opens.
Keep the bank alive
- Feed it — any new candidate who receives the tag enters the bank automatically: the filter is dynamic, not a frozen list.
- Take a candidate out — remove the tag from their profile (Profile → Overview → Edit).
- Act on the bank — with the bank applied, tick the candidates and use the bulk actions: follow-up email or text message, survey, Apply job to push the bank onto a Kanban.
- Export it — the Export button respects the active filter; enable the Tags field in the export panel to get them in the file.
For the details of every control (filter operators, sorting, chips, deleting a saved filter), see Candidate list & search.