

Files & resume
Where you keep every document attached to a candidate — resumes, cover letters, certifications, IDs, signed offer letters. Upload, preview, download, delete, and send documents to the candidate for e-signature.
The Files tab is where you keep every document attached to a candidate — resumes, cover letters, certifications, portfolios, IDs, signed contracts. You can upload files, preview them on the page, download them locally, delete them, and send them to the candidate for electronic signature when the document needs to come back signed.
The toolbar
At the top of the tab you’ll find two action buttons on the left and a sort control on the right.
Add Files
Click Add Files to open a side panel where you can drag in one or more files. Drop them into the upload zone, or click to browse.
Supported file types:
- Word documents — both modern .docx and the older .doc
- OpenDocument Text (.odt)
When you’ve picked your files, click Add files at the bottom (it changes to “Adding” while uploading). Click Cancel to drop everything and start over.
About accented filenames: Nextal converts accented characters in filenames to their plain equivalents before saving — so “CV — Amélie Dubé.pdf” ends up saved as “CV___Amelie_Dube.pdf”. The document content is unchanged; only the filename is simplified.
Send document
Click Send document to send a document to the candidate for electronic signature. This is how you send offer letters, NDAs, or any agreement that needs the candidate’s signature.
The flow is two steps in a dialog:
- Pick a document template — choose one of your organisation’s saved templates from the list.
- Fill in the signer roles — every template defines roles (typically Candidate, User, External). For each one, set the name, email, and language. The Candidate role is pre-filled with the candidate’s info; the User role is pre-filled with you; External roles you fill in yourself.
Click Send and the document is sent for signature. It also appears as a row in the Files tab so you can track its status alongside the candidate’s other documents.
Sort the file list
Click the sort icon on the top-right to open a small menu. You can sort the list by Creation date, either ascending or descending. Default is newest first — so the most recently uploaded file is always at the top.
The file list
The left column shows every file attached to the candidate. Each row displays:
- A radio button to select the file (clicking the file selects it)
- The file type (PDF, Word, etc.)
- The date it was added
- The filename — truncated to 25 characters with an ellipsis if longer
When the tab opens, the newest file is automatically selected and shown in the preview on the right.
The preview panel
Whatever file you select on the left is shown in the panel on the right.
For regular files
You’ll see:
- The filename (clickable to open in a new browser tab)
- The creation date and time
- The file content rendered in an embedded viewer
PDFs, images and Word documents render directly in Nextal, every page of them. The preview toolbar shows the current page and the total — 3 / 12 — with arrows to move between pages, plus zoom controls.
Older office formats — older Word (.doc), OpenDocument (.odt), Excel, PowerPoint, rich text — are shown the same way: Nextal converts them to PDF the first time they are opened (a few seconds for a long document, instant afterwards) and displays every page. If a file cannot be converted, the preview says No preview for this file and offers Download — the original is intact.
For documents sent for e-signature
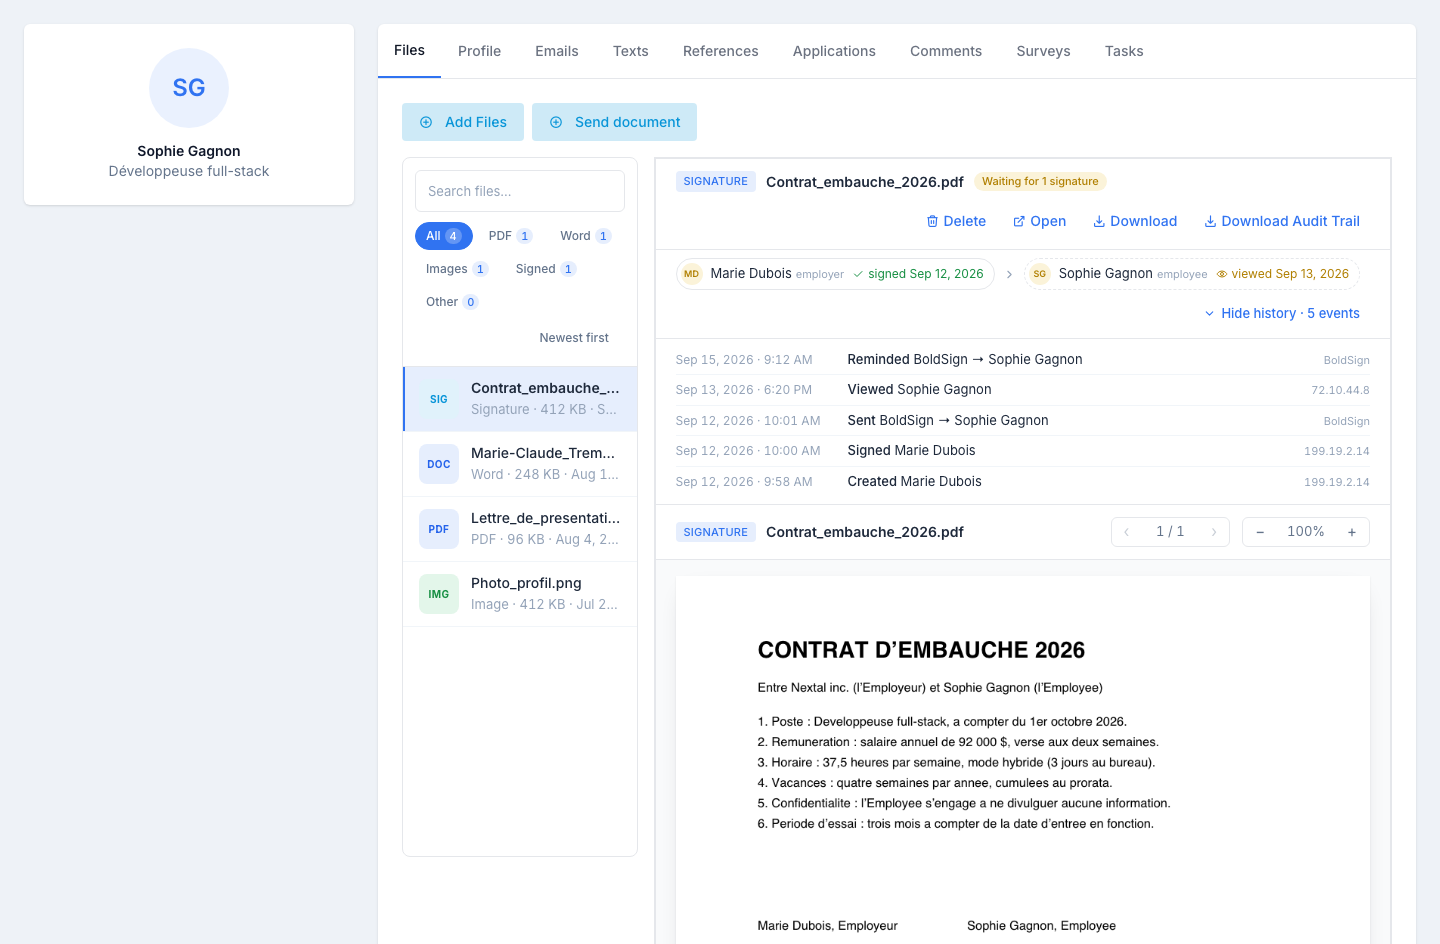
A document sent for e-signature reads like any other file — no tabs to go through. Top to bottom:
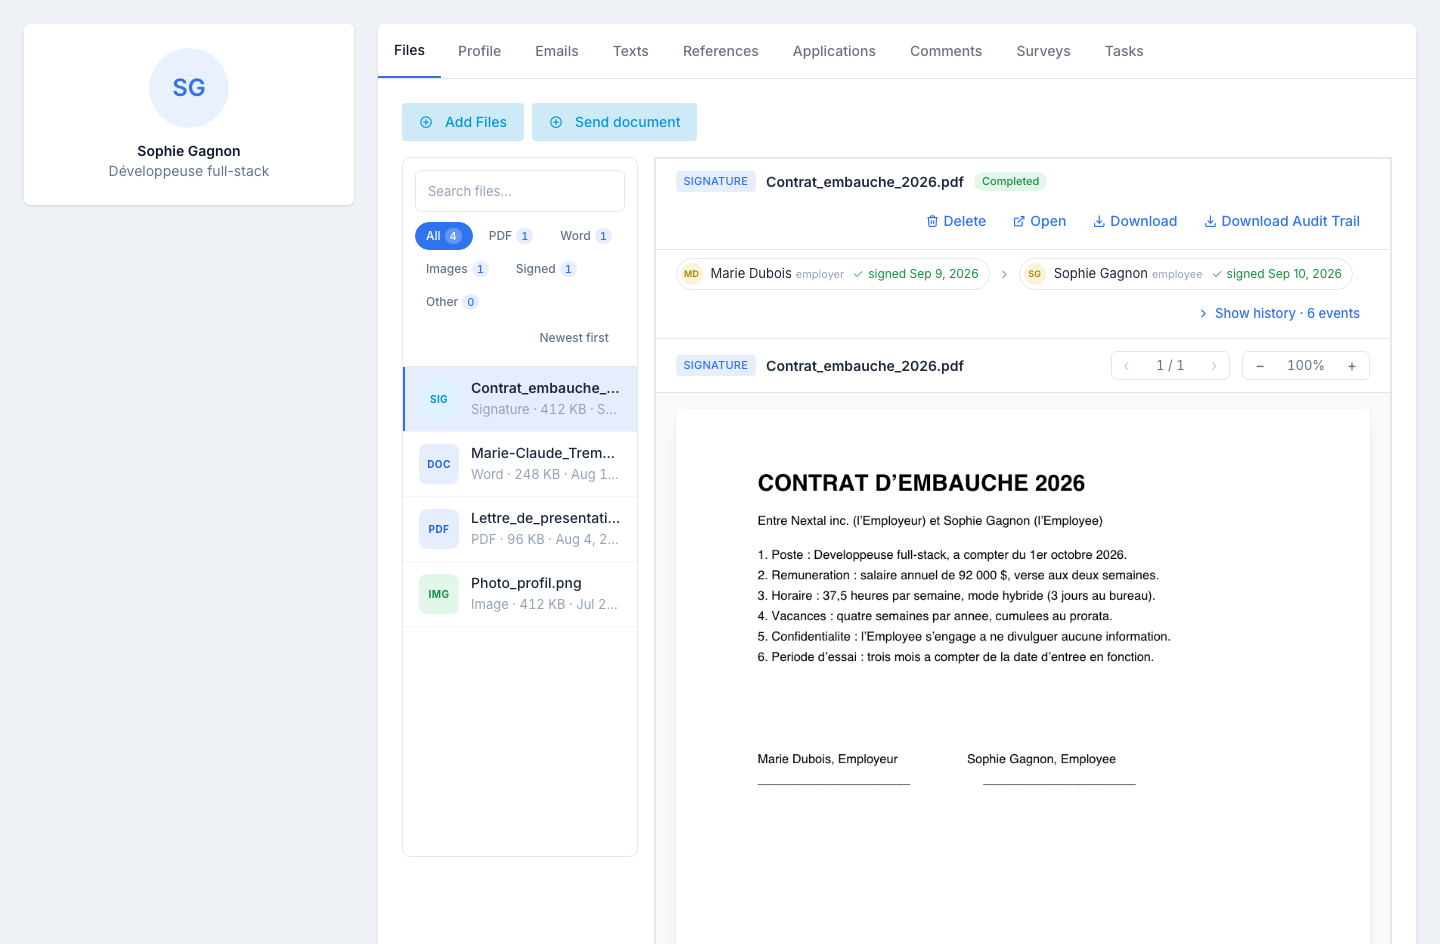
- The toolbar — the Signature pill, the file name and a status pill: Completed (green), Waiting for N signatures (amber, the number of signatures still missing), or Declined, Expired, Revoked (red). On the right, Delete, Open, Download and Download Audit Trail (the signing log as a PDF).
- The signers strip — one chip per person, in signing order, each with its state: signed with the date, viewed with the date (the document was opened but not signed), not viewed, or in red delivery failed / authentication failed / the person’s own status when they declined. When the sender is not a signer themselves, they open the strip with the role sender.
- Show history · n events — unfolds the document’s timeline in place: date and time, action (created, sent, viewed, signed, reminded, completed…), the person concerned and the IP address. The history is folded by default on a completed document and open on the others. On a declined or revoked document, the reason given appears as the first line.
- The document — the latest version of the PDF, page by page, with the same page and zoom controls as the other files.
The action bar
Three buttons sit at the top-right of the preview panel:
- Open — opens the file in a new browser tab
- Download — saves the file to your computer with its original filename
- Delete — opens a red confirmation dialog. Click the red Delete button to confirm; you’ll get a green notification saying “Candidate file has been deleted”. If something went wrong on the server, you’ll see “Candidate file can not be deleted please try again later” instead.
If the candidate has no files yet, the preview panel shows: “Please select a file to display it content here”.
Which file types you can upload
The Add Files panel only accepts these four formats:
- PDF (.pdf)
- Word (.doc and .docx)
- OpenDocument Text (.odt)
Other file types — like PNG, JPG, Excel, CSV — can’t be uploaded through this panel. If a candidate’s profile already contains those formats (for example because they came in through a CV parser or another import path), images and text files such as CSV show in the preview; for an Excel spreadsheet the panel invites you to download the file instead. You just can’t add new ones of those types here.
Who can do what
| What you want to do | What you need |
|---|---|
| Open the Files tab and read files | Access to the candidate |
| Open or download a file | Same — access to the candidate |
| Upload a file | Same — access to the candidate |
| Send a document for signature | Same — plus your organisation’s e-signature setup must be configured |
| Delete a file | Same — access to the candidate |