

Enable automatic LinkedIn import
The Nextal LinkedIn Profile Scraper Chrome extension lets you automatically import LinkedIn profiles into Nextal, without a review step. With the Auto-Import feature, as soon as you visit a LinkedIn profile it is sent directly to your ATS — a real time-saver for recruiters processing a high volume of candidates.
This guide explains how to enable, configure, and reset the extension’s auto-import settings.
Step 1: Open the extension settings
From a LinkedIn profile, open the Nextal extension side panel. In the top right of the panel, you will see the “Connected” connection indicator alongside a gear icon.
Click the gear icon to open the extension settings page.
![]()
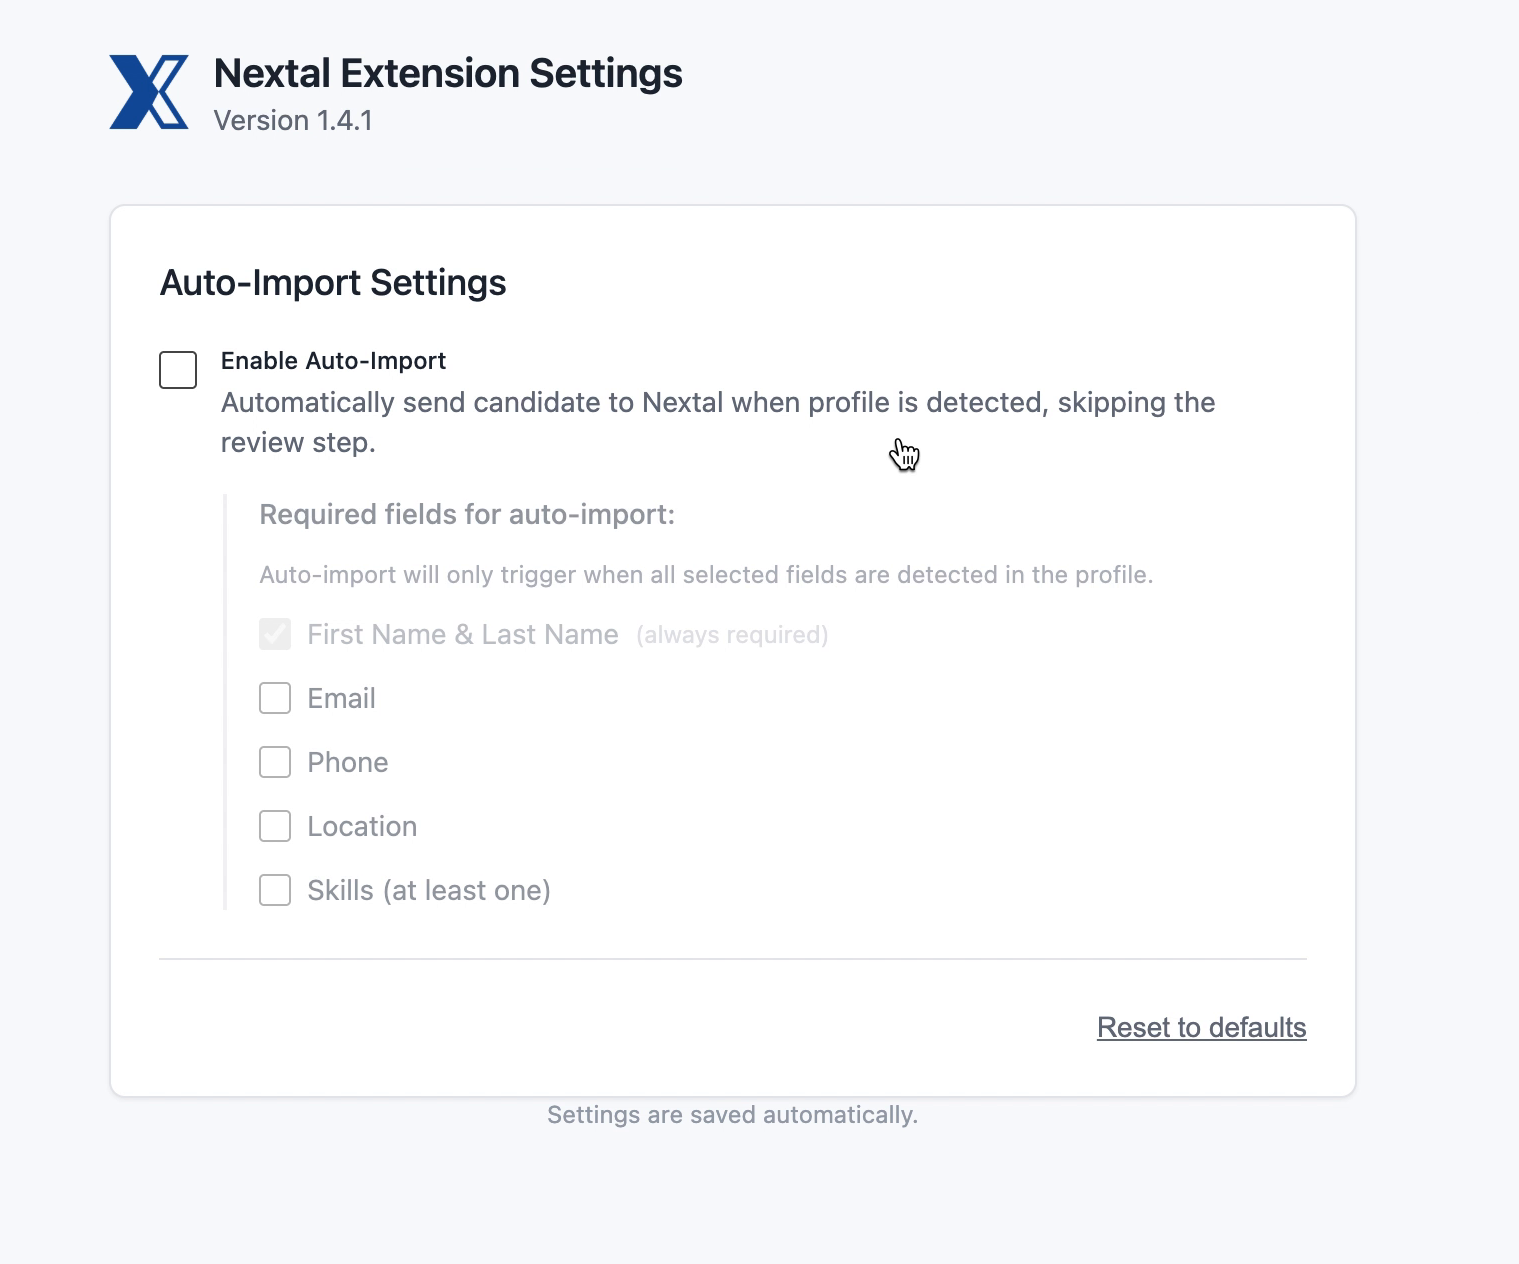
Step 2: Discover the Auto-Import Settings page
A new tab opens with the Nextal Extension Settings page. This page contains the “Auto-Import Settings” section, which includes:
- “Enable Auto-Import” — the main checkbox to enable or disable auto-import
- “Required fields for auto-import” — the fields that must be detected in the LinkedIn profile for the automatic import to trigger
- “Reset to defaults” — a link to reset all settings to their initial state
Step 3: Enable auto-import
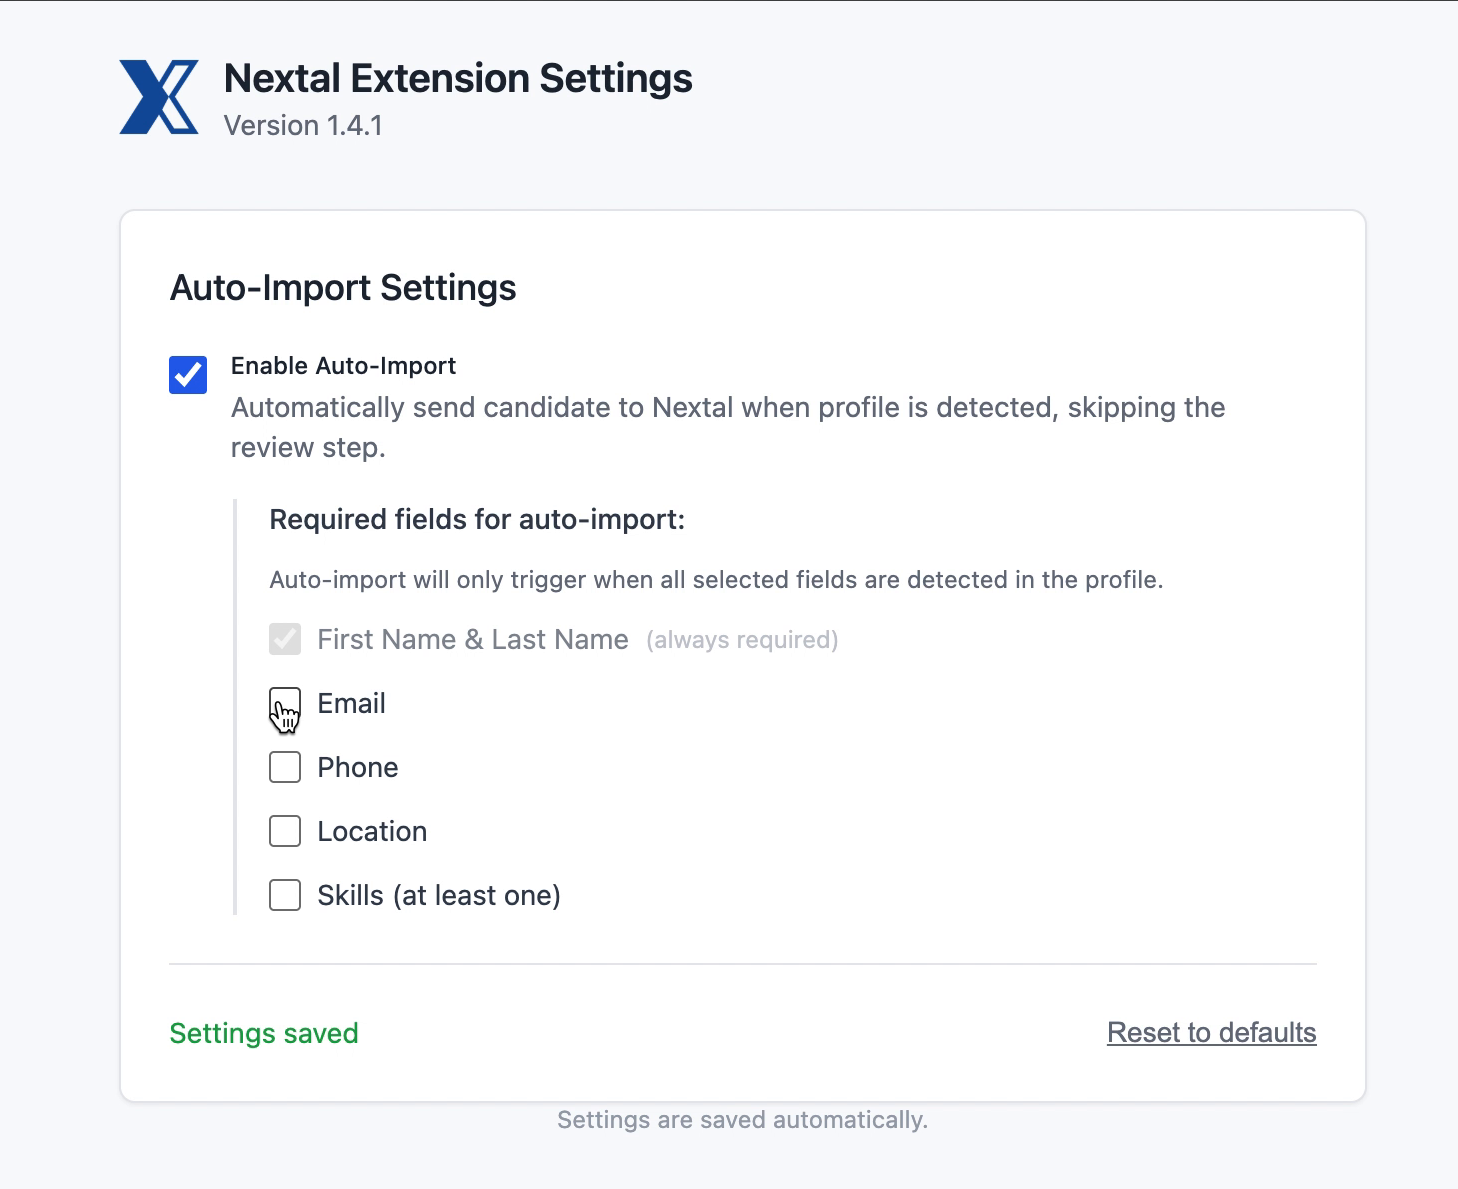
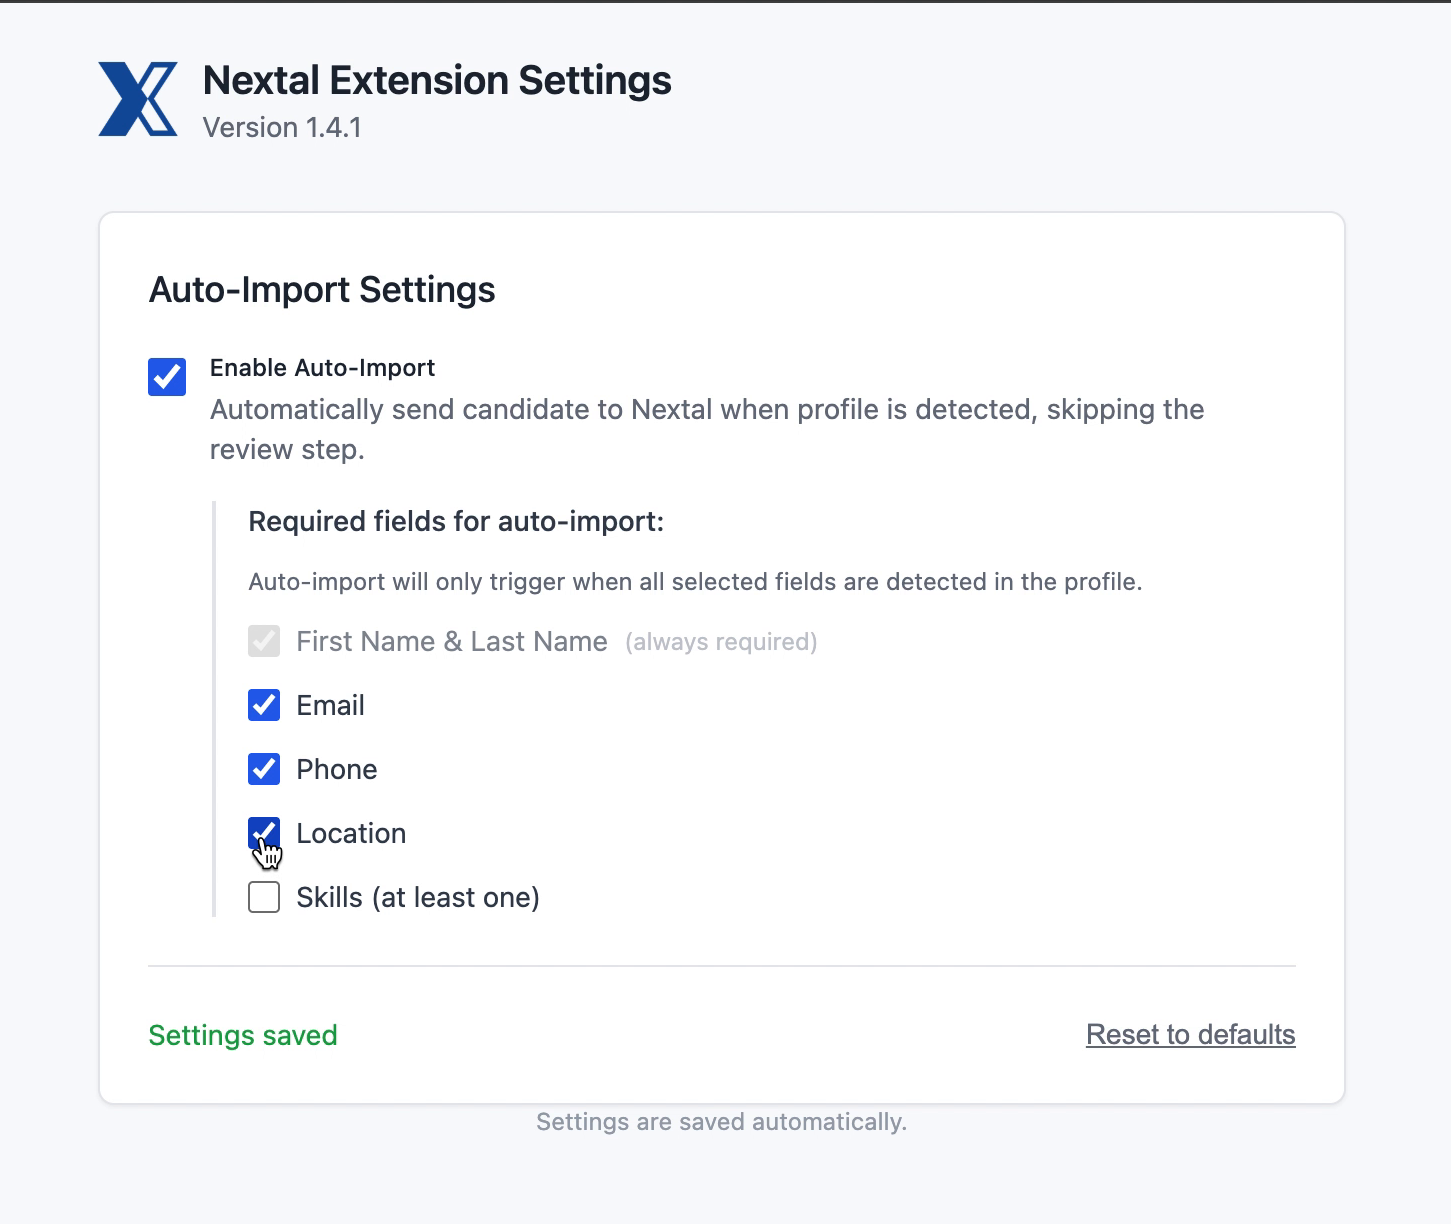
Check the “Enable Auto-Import” checkbox to activate the feature. Once enabled, the extension will automatically send LinkedIn profiles to Nextal when you visit a profile page, without a review step.
A “Settings saved” message appears in green at the bottom left to confirm that your changes have been saved.
Step 4: Configure required fields
The “Required fields for auto-import” section lets you define the minimum conditions for a profile to be automatically imported. Auto-import will only trigger if all selected fields are detected in the LinkedIn profile.
The available fields are:
- First Name & Last Name — always required (cannot be unchecked)
- Email — the candidate’s email address
- Phone — the candidate’s phone number
- Location — the candidate’s location
- Skills (at least one) — at least one skill must be detected
Check the fields you want to make mandatory. For example, if you check Email and Phone, auto-import will only trigger if the LinkedIn profile contains both an email address and a phone number.
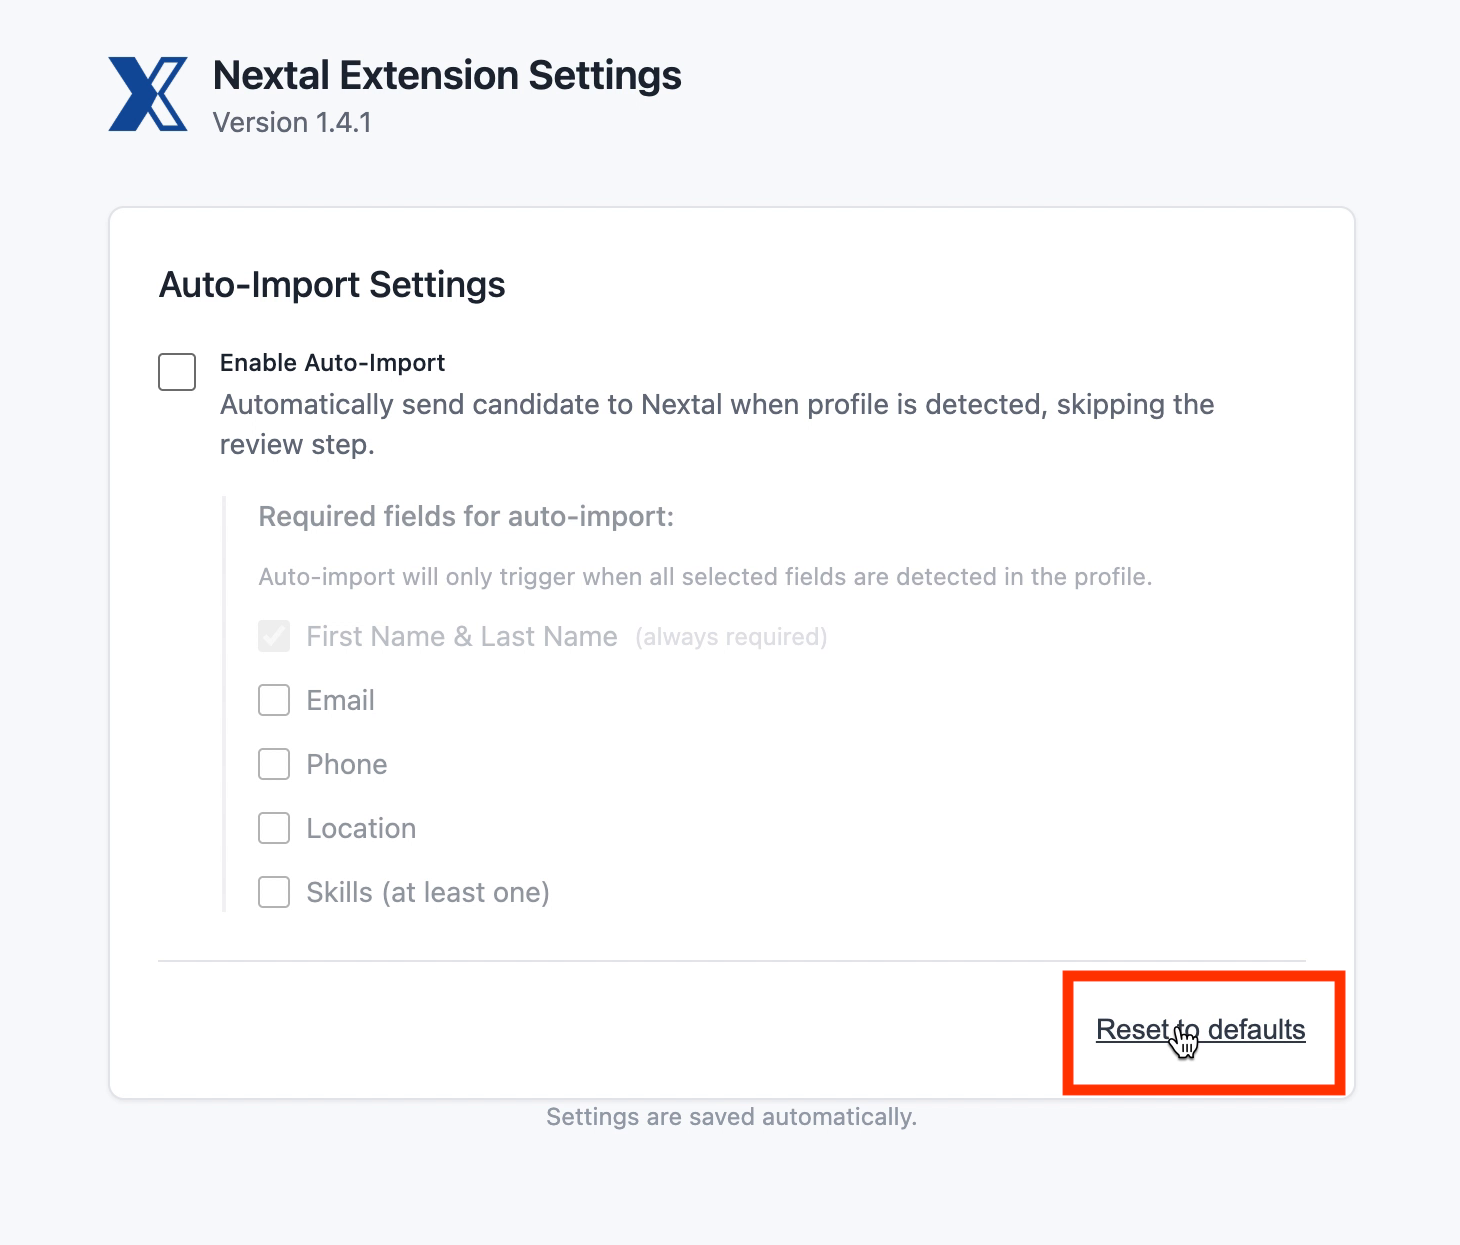
Step 5: Reset to defaults
If you want to return to the initial configuration, click the “Reset to defaults” link at the bottom right of the section. This action:
- Unchecks the “Enable Auto-Import” checkbox
- Unchecks all optional required fields (Email, Phone, Location, Skills)
- Returns the extension to manual import mode (with review step)
Tips
- For fast import with no filter: enable auto-import without checking any optional fields. All visited profiles will be imported automatically as soon as first name and last name are detected.
- For selective import: check only the Email field to automatically import only profiles whose email address is available — ideal if you want to be able to contact candidates immediately.